
Wednesday, December 28, 2011
Missing In Action
Well, the festivities of the holidays over the past couple of months took over, and I neglected the blog--not that I haven't been creating! I've been taking pictures of a few projects and hope to get them up this week. Stay tuned!
Wednesday, November 9, 2011
Build A Tent Day

I had big plans today. I was going to make birthday cards to last me until the end of the year. Well, I got a bit distracted, and built a tent for my little guy instead. 

We used his folding tent, the couch, the TV, the coffee table, and anything else I could hook a sheet to. I'm not sure who had more fun-me or him. :-)

He may have even had more fun throwing his ball onto the tent than actually playing in the tent.

It was a fun indoor activity for a chilly day inside. I did get three cards made and two started, so I'll try to share those tomorrow.
I'm linking here:
Friday, November 4, 2011
For A Little Boy Who LOVES Big Trucks

I had my mom secretly get one of my dad's old work shirts, so I could cut it up and make a little shirt out of it. I just had to search his closet for pants and an undershirt to go with it (it wasn't too hard since I went overboard at a consignment sale about a month ago). My dad, and all the other drivers for that matter, thought it was pretty cool. :-)
Sunday, October 30, 2011
One of Two & Two of Two

My cousin is having twins! One is a boy and one is a girl. I wanted to get something for the baby shower for them that matched somewhat, but finding matching outfits for a boy and a girl is a little difficult. Then it came to me. Why not make them something? I came up with the idea of using the common phrases for a pair of items-"one of two" and "two of two". It was fairly simple, and here's how I did it:
I bought two plain newborn size onesies. I figured white would be a nice neutral color.

I created my design and printed it as a mirror image on t-shirt transfer paper.


I'm linking here:
Pumpkin Carving Party

Looking for a fun idea for Halloween pumpkin carving? Why not have a pumpkin carving party? We had several of our friends and family over for a Pumpkin Carving Party. Everyone had different ideas and different techniques. I hope you enjoy some of the pictures!


Wednesday, October 26, 2011
5 Minute Magnet Tutorial
I printed some wallet size pictures for a collage picture frame (a Christmas gift) the other day and ended up with extra prints. I was just going give the prints along with the frame, but then I got to thinking that they may want to put the prints on the fridge. I didn't want the picture to be covered up though, so I thought it would be a good idea to turn the pictures into magnets themselves. Here's how they turned out:

Here's what you need to make your own magnets:
- A wallet size picture (you may have some senior pictures that were sent with graduation announcements)
- A business card size magnet or a sheet type magnet to cut (we get these magnets with our phone books)
- Some type of adhesive (a tape type adhesive will work better than glue)
- Scissors

Trim the magnet to a size just smaller than the picture.

Apply the adhesive to the magnet.

Line the picture up with the magnet. Place the picture over the magnet and press firmly.

And that's all there is to it!

I made several in about 10 minutes.

This is a great project to use up those business size magnets that sometimes come with the phone book and a nice way to display wallet size pictures (senior pictures that you sometimes get with graduation announcements for example).
Monday, October 24, 2011
An Oldie But a Goodie


Those pieces of wood each have a hold drilled near the top and are are attached together with a small cord.
It's a fairly simple construction, but it will be good for hours and maybe even years of fun.
Sunday, October 23, 2011
Pillow By Day...Blanket By Night
 |
| Pillow By Day... |
 |
| ...Blanket By Night |
On one side of the blanket has a pocket that is approximately 1/3 the width of the blanket.


Flip the blanket so the pocket is face down and fold in half upward.

Fold in half again, so that the blanket is folded to the same size as the pocket.

Turn the pocket inside out so that the blanket is inside the pocket, and now you have a pillow!

Saturday, October 22, 2011
To Go With A "Whiteboard"

One of the first projects I've tried after finding the craft blogging community was a "whiteboard" of sorts. I saw the original here at things for boys. Here's her version:
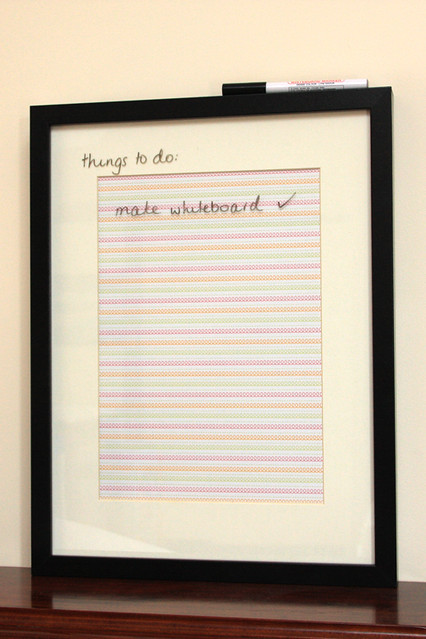
My version is below:

I wanted to add something to keep the dry erase marker attached to the board, so I followed the tutorial here at Michael Ann Made for making a friendship bracelet. I made it about 14 inches long and attached it to the back of the frame simply with some tape. I tied the end to the marker lid with a nice little bow and that was that!

Friday, October 21, 2011
Five Fall Favorites
I'm feeling so inspired to create some Autumn/Fall projects. Here are some of my favorite posts I'm thinking about this Friday:
 |
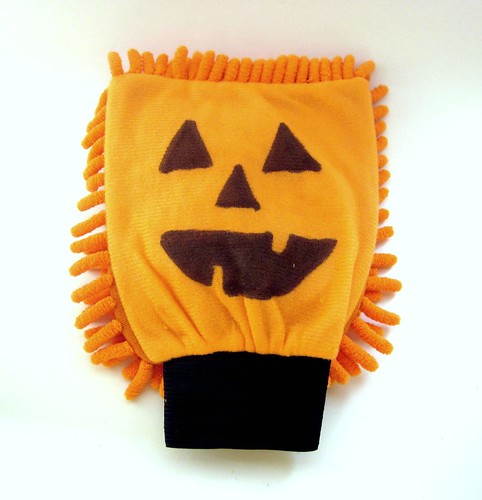 |
| Jack-o-Lantern Puppets from Two Girls Being Crafty |

 |
| Halloween Treats from I Am Momma Hear Me Roar |
 |
| Monogrammed Pumpkin from I Am Momma Hear Me Roar |
 |
| Simple Fall Decorating from Snowflakes and Dragonflies |
Tuesday, October 18, 2011
A Leafly Card!
 |
| A Leafly Card for a Leafly Day |
A few years ago, I tried using leaves as stamps, and I was surprised at how well it worked. So, I decided to break out this technique again and went on a leaf hunt one night while taking a walk around the neighborhood. There are so many interesting shapes! These are the leaves I found for the project:

You can use the leaf kind of like you would a stamp just be sure to work a little more gently, so the leaf doesn't get torn.


I stamped a lighter piece of card stock with a larger leaf and glued it to the inside for the message area.

I went ahead and created all four cards, but placed the sentiments in different places. Each card is unique, but all of them are very leafly if I do say so myself!

I went ahead and created all four cards, but placed the sentiments in different places. Each card is unique, but all of them are very leafly if I do say so myself!
Subscribe to:
Posts (Atom)